With all of this rainy weather here in Homestead, FL.... it's perfect for staying indoors and crafting! I wanted to do some photo transfers onto canvas and purchased my supplies to do so. Canvas was also on sale, which was an added bonus ;)
Supplies you will need:
-Mod Podge Gloss (to seal the picture in)
-Liquitex Gel Medium (to transfer the photo)
-Canvas (any size)
-Pictures (size needs to match size of canvas & needs to be printed on regular printer paper)
-Painting Brush/ Foam Brush
-Cup of Water
-Rag/Towel
Step 1: Print your pictures in color/black & white/sepia depending on your preference. Make sure to print this on regular printer paper...NOT picture paper.
Step 2: Trim the picture to be flush around the edges with the canvas.
Step 3: Using your brush, paint top of the canvas using the Liquitex Gel Medium.
Step 4: Lay your photo upside down on the canvas being sure to smooth out all of the bubbles and that it is centered. (It should look like the photo below).
Step 5: Let it dry. Usually overnight, if you can't wait, then at least a couple of hours until it dries fully.
Step 6: Bring out your rag and a cup of water. Wet the rag and then rub wet rag over the photo on canvas. You will now start to see the photo underneath.
Step 7: Keep rubbing rag over the canvas/photo until the paper starts to peel completely.
Step 8: Dry it up with the dry side of the rag.
Step 9: Seal using brush and by rubbing Mod Podge Gloss over it. It will look white on top, but it will dry clear.
Step 10: Allow the sealer to dry fully before hanging or displaying.
Step 10: Enjoy your new photos :)
These are my photos waiting to dry....
10.29.2011
Snow Globe Tutorial
In January I will be decorating the kids room so I had an idea to build them shelves above their bed and place some snow globes on their shelves to match their decor. Before I do this however, I wanted to do a test run.
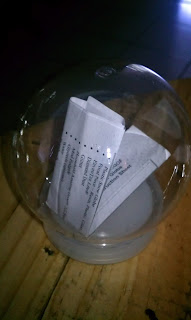
I found these little globes at Michael's that come with instructions inside on how to make them.
The idea is pretty simple. All you need are the following items:
-Snow globe from your local crafting store. (or you can substitute by using a mason jar)
-Figurine you'd like to place on the inside. (plastic, porcelain or metal- if using metal make sure it won't rust first)
-E6000 glue
-Distilled Water (boil tap water and allow it to cool)
-Snow powder and/or Glitter
-Liquid Glycerin
First, glue figurine to the inside of the lid using the E6000 glue. Allow to dry for a few hours until completely dry. Second, fill the jar half way with distilled water. Next, add one drop of glycerin (use two drops if it's a larger jar.) This will aid in dropping the snow powder/glitter slower.Then, add sparkles and fill jar to the very top with water. Lastly, add glue around the inside rim of the lid before closing it into the jar/globe.This will help to seal the lid so that children will not be able to remove it. Allow to dry fully. You can also embellish by using ribbon, paper to line the bottom part of the globe (lid), etc.
Shake, shake, shake and enjoy!
Gumball Machine Tutorial
I LOVE gumball machines! They can be quite costly. Something about them makes me love them so much. I do not know if it's the candy apple red color of the original machines or just the gum within it, but something about it made me want to recreate one.
I found this tutorial online of how to make one using the inexpensive products below and got to work:
This is what I came up with!
I decided to do it in chalkboard black paint instead since I can write little messages below such as "Happy Halloween" as I fill it with candy corn. I can even write "Merry Christmas" on it and fill it with peppermint. It can even be decorated with ribbon, etc. You can even make a larger one and use it as a beta fish tank. The possibilities are endless really!
I found this tutorial online of how to make one using the inexpensive products below and got to work:
-Small terra cotta pot and base from your local craft or home improvement store.
-Small round votive holder (in the glassware/candle holder section at Michaels)
-Red spray paint (or the color of your choice)
-E6000 adhesive (also available at your craft store)
-Small wooden balls/knobs they are in the wood section of your local craft store. They are flat on one side making them easy to adhere to your machine.
This is what I came up with!
These are old-fashioned Xmas Candies I want to add. |
I decided to do it in chalkboard black paint instead since I can write little messages below such as "Happy Halloween" as I fill it with candy corn. I can even write "Merry Christmas" on it and fill it with peppermint. It can even be decorated with ribbon, etc. You can even make a larger one and use it as a beta fish tank. The possibilities are endless really!
For the time being, I filled mine up with Runts...
Enjoy!
Subscribe to:
Posts (Atom)