Showing posts with label pillow. Show all posts

2.11.2012

Decorative Pillow

I am so proud to announce that what would have cost me about $40 each to purchase...I made with materials I had at home and some other items I had to purchase in order to complete the project.

I am really happy with the outcome of it. It goes so well with the green pillow that we purchased at Big Lots a few weeks ago. The hubby is a wonderful inspiration, he always gets these great ideas that gets the creative juices flowing, then I make his vision a reality. What a team!

I'm off to make the 2nd pillow now. I am already dreaming up the 1 pillow that I will make for the center to bring it all together. Let's see what happens.

Turned these 2 ribbons into 1.

Don't you just love the glittery ribbons?


Here it is completed with the exception of the center pillow.

1.18.2012

Decorating the New Place

Finally! Our last piece of furniture was delivered today. I am excited about decorating my new place and making it cozy with less decorations but the wow factor obviously in place.

I've been working on a lot of DIY's around the house to try and make the most of furniture and decorations we already had rather than giving them away or donating them. For example, this is a table that was given to me so I upcycled it by painting it and adding the glass to it, which it didn't have.
Before: Bronze Metal Table
After: Black Metal Table
Here it is pieced with my new dining room set.
On the empty wall I found an idea of what I want to do with a few canvases to make one big picture. I think my husband and I are going to attempt to paint our own...
Isn't it gorgeous? Wow! Blows my mind!

Last week we got our leather sectional, which I am currently trying to find decorative pillows for. I am looking for some solid colors and some decorative peacock pillows to go in front of the solid ones. I also need to change my pillar candles since I am no longer going to decorate in the red and burnt oranges I had planned to do.
My new leather sectional


I have all of these ideas in my mind of what I want to do with my new decor. I want to use all of the peacock colors to decorate between my living room and dining room.

I went shopping this weekend at Pier 1 Imports and found a bunch of new items that have the peacock colors. For one thing they had this peacock diffuser, which I loved. HOWEVER...I did not want to pay $30 for it!
So I decided that I was going to make my own (cost me about $5 or less to make)....and here it is...voila!

Much nicer I'd have to say, especially for the value. I purchased the glass and the diffuser reeds at Wal-mart. The rest of the items I had on hand.

This is what I want to do to create the centerpiece of the dining room table with wine bottles of different heights. The one on the lobster is one of the bottles I have, along with a few others to start this project with. Maybe this weekend I will get a head start. I'm planning on painting them different colors, but of course with the peacock palette colors we are using.


Off to bed I go...this little head of mine has way too many ideas and I'm going to save them for the weekend. Nite nite!

11.14.2011

Pillow Tutorial


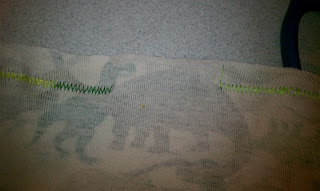
While cleaning out the kids closet, in preparation for our move within the next couple of months, we found clothes that no longer fit the kids. In the pile I found this long sleeve pajama shirt that Dominic loved so much. He loves dinosaurs. Then this got me thinking....why throw it out or give it away if he enjoyed it so much?! Perhaps I could turn it into something that he would really enjoy. Then I thought about his blanket that he carries around with him everywhere he goes...and then the light bulb turned on in my head ::bing:: well how about a pillow to match? Here begins my journey on making his little pillow.
Find any shirt or article of clothing to use.
Search internet for big bold letter of child's first name. Print. Cut.
Attach letter to fabric and fusible lining and cut out.
Attach fused letter to fabric by pinning down.
Sew around letter- inside & out  (applique)
Turn fabric inside out and sew around all edges except the top.
Sew the top leaving a 2" gap for turning inside out.
Turn inside out and stuff the pillow. Next, hand sew the top opening.
Here is the sewn top.
Completed pillow!
Enjoying his dinosaur pillow


 Of course, I had to make my daughter, Sanaris one also. In her pile I found an old sweater that she had that no longer fit her. I was so attracted to this bright pink color and the beautiful selection of buttons on this sweater. It broke my heart to give it away so I decided to make her a pillow to enjoy as well. She loved it, can't you tell?!
Enjoying her pink pillow