Showing posts with label tutorial. Show all posts

3.11.2012

Paper Bead Tutorial

Every little bit counts. Therefore, if you have any scrap paper lying around, turn it into something special. At times I have had a scrap paper I enjoyed in particular and have saved the scraps off it to see what I can use it on next.
You can either use scrapbooking paper, decorative paper, magazines, or you can simply draw on a sheet of paper to create patterns. On this tutorial I chose to just simply draw on paper to create my own paper beads.

All you really need to create these paper beads are the following supplies:
Paper, ruler, pencil, scissor, wooden skewers, glue, gloss spray varnish (or I used ModPoge), cord for strining,  jewelry findings for creating a necklace/bracelet/earrings/etc and needle nose pliers.

Step By Step Instructions:
Step 1: Use bead templates to choose the shape of your paper strips. Rule strips on the back of your paper and then cut them out.

Bead Template Shape

Step 2: When you have cut several strips, you can start to roll your beads out. Begin by rolling the thick edge firmly around the skewer. Then run the glue stick along the remainder of the triangle and continue wrapping the paper around the skewer until you reach the end. Make sure the paper is wrapped tightly on itself and the end is glued down really well.

Step 3: Continue to roll beads this way until you have covered most of the skewer. Then rest skewer end on the edges of a plastic plate or container with beads not touching plastic to allow glue to dry. Repeat.

Step 4: Spray an even coat of gloss varnish over the beads. Rotate the skewers so the beads are evenly covered.

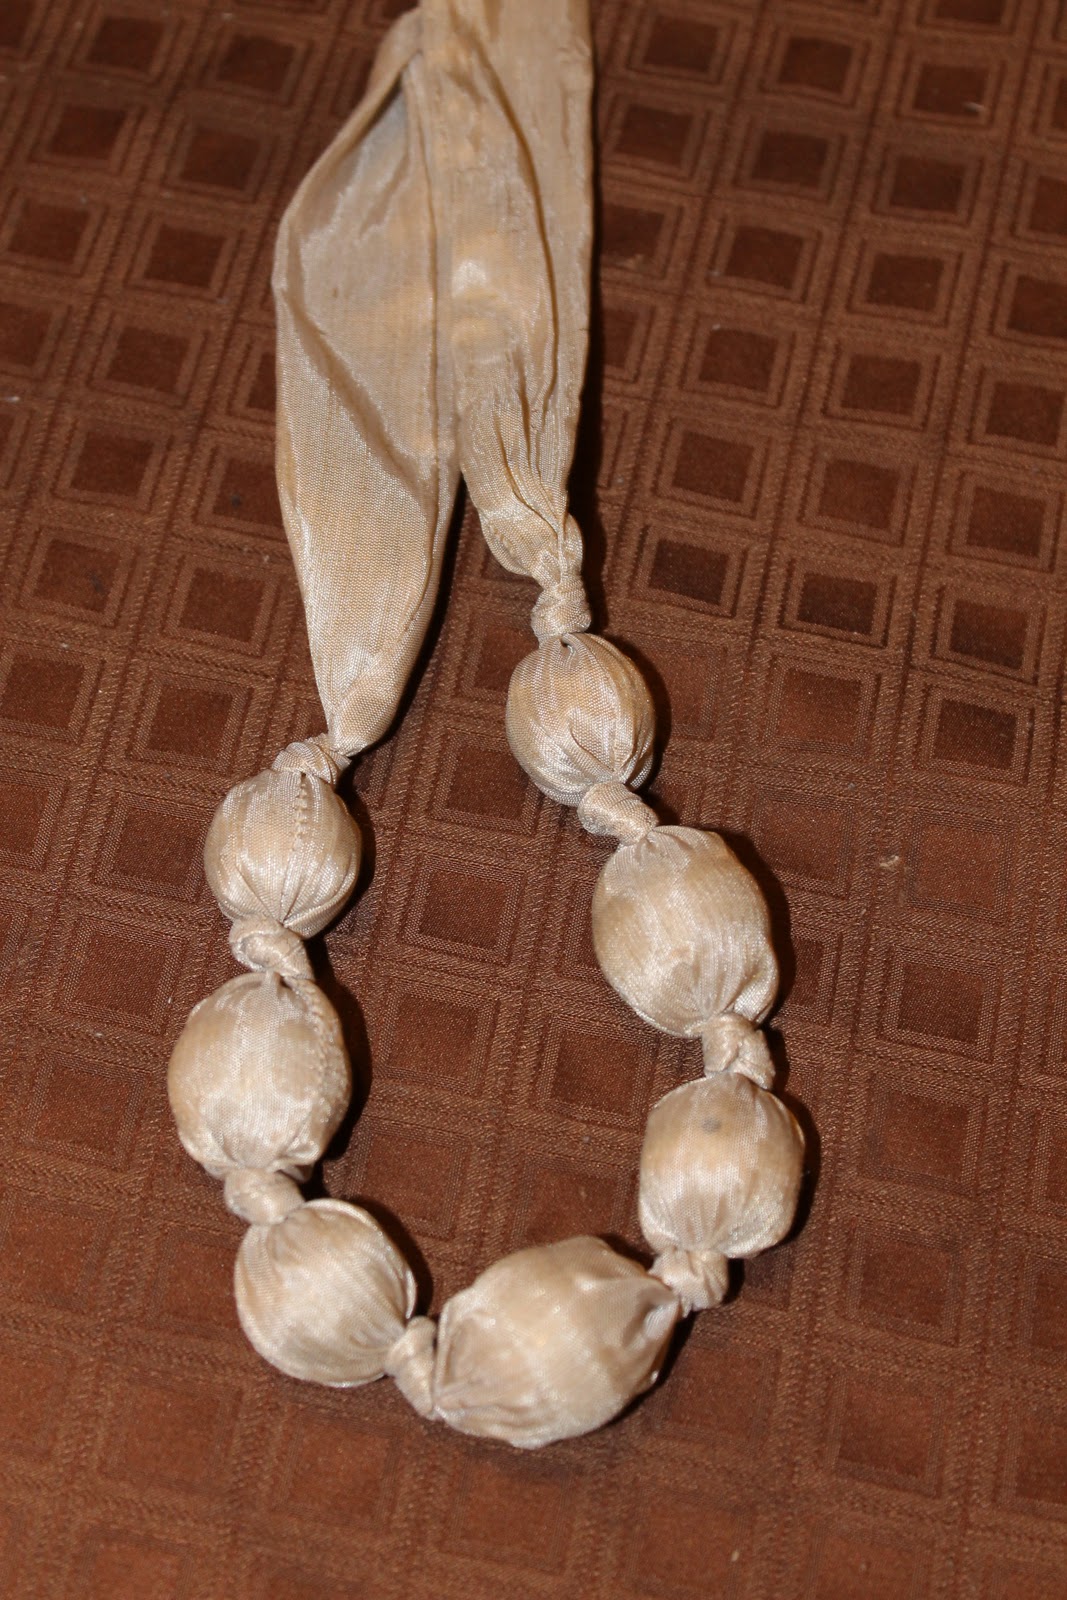
Step 5: When beads are completely dry, slim them from skewer and begin stringing together as desired. If preferred, you can knot the strands together instead of attaching jewelry findings.

Paper Beaded Bracelet


2.24.2012

Animated Rainbow Links on Blogger


Do you enjoy rainbows and a splash of color the way I do? I can't get enough of color. How boring would it be if we still lived in a world full of just black and white?! BORING!

So let me help you add a little color to your blog by presenting to you this amazing feature provided by Spice Up Your Blog. What this cool gadget does is transform all of your links on your blog into rainbow changing colors.

In this EASY one click step, they show you how to transform all of your links on your Blogger/blogspot. All you have to do is click on the link above and then click on the button that looks like this...
and it automatically sets it for your in your blogger page. What's even cooler than this is that you can remove it just as easy by deleting the widget right off of your elements page.

Take a look at what it looks like right here on this test page or simply by hovering over any of the links on my page.

Let me know how you like it...leave me a comment! :)

1.03.2012

Gnome Sweet Gnome

I found these cute little gnomes just in time for Valentine's day!!

I thought they were so adorable and I just had to share them with you guys. I know Valentine's Day is a month away, but time passes by so fast that I could not help to get your creative juices flowing before Valentine's day. Make your "Valentine" a special treat.

All you need is:
  • Glue
  • Googly Eyes
  • Pen/Marker
  • Felt
  • 3/4" Office Dot Sticker or paper cut into a circle
  • Hershey's Kisses
  • Soda Can 
  • Paper Clip(s)- to create multiple at a time.


Instructions:
1. Create a 3" circle of felt by pressing the bottom of the can into the felt and cutting along the impression it leaves. Cut the circle into quarters.
2. To form the hat, run a thin line of glue along a straight edge of one felt quarter and press it to the other straight edge. Use a paper clip to hold the edges in place. When the glue is dry, remove the clip. Save the other quarters to make hats for more gnomes.
3. Glue the hat in place on the kiss, then stick or glue on the eyes. Allow the glue to dry. Use a pen or a marker to write a dot sticker and press it to the bottom of a kiss.

12.16.2011

Infinity Scarf Tutorial


The Weather in Miami is always so hot so the minute that the temperature starts dropping out of the norm, we automatically go into winter mode here. You start to see the "Miamians" wearing the Ugg boots, leather jackets and not to mention scarves. 

It made me think about Black Friday when my sister and I went to Old Navy to go shopping and she was looking at the scarves. When all of a sudden this lady from out of the state sees her looking a the scarf sale rack and says, "What do you need a scarf for, you live in Miami, when will you ever need that?" Lets just say that she was not in a great mood after that. Especially considering that we do not get cool temperature often, so it's not something we take lightly. 

I, like my sister, enjoy scarves. When I found this video online from DIY Dish, I just knew that I had to make it. It was lingering in my mind since last weekend. 

Considering that my husband has quite a few shirts that do not fit him anymore, I decided to raid his closet. What I love about this scarf is the fact that it is so easy to make since it requires NO SEWING! All you really need is a pair of scissors, a plate and a t-shirt and who doesn't have that at home?!


Supplies Needed:
  • 1 XL or XXL T-Shirt (The larger the shirt the thicker the scarf)
  • 9" Paper Plate (or any larger plate to cut circles from will do)
  • Scissors


Directions:
  • Lay t-shirt out flat 
  • If you can get 8-12 circles it will be pretty thin, but around 15-20 circles will make your scarf fuller, like mine.
  • Use paper plate to trace 15-20 circles on t-shirt. (You should be able to get between 7-10 circles on each side).
  • Cut out circles.
  • Cut each circle into a spiral shape as seen below.
  • Once cut into a spiral, stretch each piece being careful not to tear fabric.
  • Lay out each piece of fabric and lay down flat together.
  • Take a scrap short strip of fabric left over from the shirt and tie it around the bundle of stretched fabric (in the middle), to hold all pieces together. I would do a double knot so that it doesn't come undone.
  • Tie around your neck as desired! You can also add a flower, brooch or pin to accessorize if necessary.

Cut out circles into a spiral shape.


12.15.2011

Styrofoam Christmas Tree

I saw this pretty little Christmas tree somewhere online the other day and I wanted to make one for my dining room table centerpiece. I thought you might want to make one as well, so here I am sharing my tutorial with you on how you too can create one.

This is a really simple project, which I think you'll absolutely love!

First, you'll need to pick any cone you want from your local Art Supply Store. In the pictures below I have one made of cardboard and one of foam. I decided to go with the foam one since it was larger.


Next, you'll need to cut at least 4 rolls of ribbon into 4" pieces and fold them half way. Glue them together with a glue gun. I chose two different colors since I wanted to give it a bit of contrast, feel free to use as many as you like.

This is not part of the tutorial! lol. This is my sister, Jax, having way too much fun with the cones. I made her do the tutorial this time as payback for making me do some BORING homework for her the other day. ;) Looks like it's not much of a payback since she's having too much fun with my project!! Oh well...

Then, you glue the top of each of the strips and place them all the way around covering the foam cone, one row at a time. I chose to do one layer the darker green and then the one above the lighter green.

This is a more detailed picture of what it starts looking like.

This is what the tree looks like when you have a few layers in.

I ran out of ribbon since I only purchased two spools. Guess that means another trip into my local arts and crafts store ;) [I am not complaining]. So I will post my finished piece once completed.
Stay tuned!

12.11.2011

Fabric Beaded Necklace


I had this material on hand that really is for a curtain. I enjoyed the material so much since it has a natural sheen to it. I also had some large gold beads that I found rather difficult to put it into place of any accessory, it had been sitting in my bead box for about a year.

Figuring that this was the perfect opportunity to use it, I decided to make this fabric beaded necklace. I had a vintage pearl pin as well that had always called my attention and I was going to use it for a clutch, but it just looked great with this necklace...so voila!

Tools and Materials:
Sewing machine
Fabric of your choice
Thread
Sewing scissors
Chalk
Yardstick
Look Turner (or safety pin)
1-inch wooden beads

How To:
1. Use a thin piece of fabric (preferably silk or rayon).

2. Cut fabric so that the length is 55 inches and the width is 5 inches. (If your fabric isn't long enough, piece together two swatches to make the right length.)

3. Sew the sides of the fabric together to form a tube. Leave ends open.

4. Take a loop turner and turn tube inside out. (Or using a safety pin, to turn fabric inside out).

5. Take a 1-inch wooden bead and slide the bead to the center of the tube.

6. Hold the bead tightly to mark the center. Tie a tight knot on each side of center bead. Repeat process until you have about 8 beads inside fabric.

7. Sew ends closed on sewing machine.

8. Leave enough fabric on the ends to tie it around your neck (about 11 to 12 inches total).


Padded Journal

I must admit that I LOVE journals. I guess because I enjoy writing. I remember I borrowed a crafting book from my aunt once that showed how to make a padded album. This project is very similar to that. Now that I think about it, I have never had a plain composition notebook. Every time I had a notebook I always covered it up with whatever I could find, whether it be magazine pictures, boys (I think us girls always did this), fabric or just anything in general.

Here is a picture of my journal.

I use this journal for my blog ideas, crafting ideas, mailing lists, custom orders, etc. It can be used to add clippings of actual pictures you've found online of items you would like to create, etc. I decided that after every couple of pages I would add some tabs that I found at my nearest office supply store in order to divide my sections and keep my thoughts a little more organized.

My journal is a brown and teal color since I love the color combination.

Someone recently donated a few composition notebooks to me and I was thinking what a great Christmas or Birthday gift this would be.

I don't actually have a tutorial on this, but I found someone on YouTube that does and I had no idea she enjoys crafting. You will find her tutorial very resourceful and easy to follow: check it out!

Mustard Mondays

My uniform for Monday is "Mustard." Yes, we labeled all the days with the first letter of the day of the week, so next would be "Teal" Tuesdays, and so forth. We're silly like that I guess.

Well, since tomorrow is Mustard Monday, I found this necklace that was given to me, but was too boring for me to really wear. I got this brilliant idea to transform the circle into something a little more festive. I decided to turn it into a mustard color flower using my "Flower Pom Pom Tutorial."

I love the flowers because they can be used practically on anything such as: jewelry, clothing, purses, etc.

This was my boring necklace.
Cut out a felt piece the same size of the circle and glue it with glue gun.
Cut out around 15-20 circles of the same size.
Scrunch up each piece.
 Once you cut out the circles, hold it between all your fingers to scrunch it up in the center. Use your glue gun to put put some glue on the tip (bottom) and then glue one onto the center. Once you glue the middle one you will do the same all the way around that center one until you fill the entire felt.
Start with one in the middle and work your way around it.
This is it now!
I love it, what do you think?


11.29.2011

White Chocolate Peppermint Sugar Cookies

I bought this Peppermint Sugar Cookie pack at walmart.
I baked the cookies as per the instructions.
I purchased this white chocolate bar and used 4 packets.
I heated it in a microwavable safe bowl until melted, stirring in between.
I took a candy cane and crushed it.
Here is the crushed candy cane.
Once cookies were baked, I let them cool.
I dipped them halfway in chocolate and sprinkled crushed candy cane pieces on it.

Dangle Ring Tutorial

If anyone is interested in learning how to make dangle rings, I have my Dangle Ring Tutorial for sale $8. Just email me and I will send you the invoice. This is a step-by-step picture and wording tutorial that shows you how to create each individual dangle, the base of the ring and how to attach the two. If you have any questions after your purchase, you can also reach me with any technical issues you may be having and I would be more than happy to help you.


Thanks for supporting handmade!

11.28.2011

Photography Tips


Photography Tips
Macro: A macro lens shows close-up pictures of ordinary subjects-revealing an unknown world!

 If you want brilliant images, I would suggest taking pictures of a colorful subject like a cake. Using a blurred background for effect you will get striking professional-looking results. The cake will be the center of attention.

Macro is ideal for taking portrait photos, since the subject tends to stand out, while the background becomes hazy and blurred. Ex: flowers, bugs, etc.

Objects look best when photographed under natural light from a window. You can also try photographing a subject against background illumination- such as gleams of light coming through leaves. This captures images against a wonderfully luminous backdrop.

You can create an instant reflector by attaching a little wrinkled aluminum foil (using the darker, duller back side) to a piece of cardboard. Then take a little time to find the best angle for brightest illumination.

Change your view…Lower the camera position either to bird’s eye view, sky view, etc. Perhaps you want to take a picture of your pet, lower your position to your pet’s eye level to capture a better shot.

Camera settings play an important part in photography. Learn to use your camera in particular. Google or your camera manuals are a great place to start.

Try taking picture in monochrome, full color or sepia tones for a little added effect.

Want to be more adventurous? Try taking tilted shots, extreme close-ups, and more.

Shoot away!

11.20.2011

Creme Brulee Recipe

*This recipe came courtesy of Martha Stewart's cooking school.*

Yield: Serves 8

Ingredients:

  • For Custard

    • 4 cups heavy cream
    • 3/4 cups sugar
    • 1 vanilla bean, split lengthwise
    • 7 large egg yolks
    • 1/4 teaspoon coarse salt
  • For Topping

    • 3/4 cup sugar

Directions

  1. Prepare oven and baking dishes: Heat oven to 300 degrees. Bring a kettle or pot of water to a boil. Place eight 5-ounce baking dishes in a large roasting pan.
  2. Gently heat cream: In a medium saucepan, combine cream and half the sugar (1/4 cup plus 2 tablespoons). Scrape vanilla bean seeds into pan, then add pod. Heat over medium just until mixture starts to bubble around the edge of the pan, 7 to 8 minutes (do not let boil).
  3. Meanwhile, whisk egg yolks: In a large mixing bowl, whisk the egg yolks with remaining sugar and the salt.
  4. Temper eggs: Use ladle to pour a small amount of the hot cream mixture into the egg mixture, then whisk to combine. (This is called tempering and prevents the eggs from curdling.) Add two more ladles of cream mixture, one at a time, whisking to combine after each addition. Gradually whisk in remaining cream mixture. Strain through a fine sieve into a large liquid measuring cup (to remove the vanilla pod and any cooked bits of egg).
  5. Bake: Divide custard evenly among baking dishes. Place pan in oven. Add enough boiling water to come halfway up the sides of the dishes. Bake until custards are just set (they should tremble slightly in center when shaken), 30 to 40 minutes.
  6. Chill: Remove pan from oven. Use tongs to carefully remove dishes from hot-water bath and place on a wire rack for 30 minutes. Then, cover with plastic wrap and chill for at least 2 hours (or up to 3 days) before serving. The custard will finish setting in the refrigerator. If you like, transfer the custards to the freezer 15 minutes before serving to ensure they stay cold after being bruleed (this is especially important if using the broiler).
  7. Caramelize tops and serve: Sprinkle about 1 1/2 tablespoons granulated sugar over each custard. Working with one at a time, pass the flame of the torch in a circular motion 1 to 2 inches above the surface of each custard until the sugar bubbles, turns amber, and forms a smooth surface. Serve immediately.

11.19.2011

Snow Globe Nail Tutorial


Someone told me about a nail supply store here in Homestead, FL that sells nail polish at wholesale prices. So I decided to stop by and pay them a visit yesterday for this idea I had in mind.

If you happen to be in the Homestead area or live in the homestead area...visit Miami Nail Supply. They have nail polishes such as O-P-I for less than $5, Essie for less than $3. They even have less expensive ones like Jade or Color Club from $1-2. It's definitely a bargain and well worth it, especially if you change your nail polish color as often as I like to change mine.

So on my visit yesterday I purchased the following:

You don't have to buy the same ones, but you can purchase something similar, or you may already have these items at home.

DIRECTIONS:
1. Paint your nails with a clear base coat. (I used Jade-Milky base coat)
2. Paint your nails with 2 coats of white. (I used Jade-Snow White)
3. Paint your nails with a shimmery glitter paint. (I used Color Club-Starry Temptress)
4. Paint your nails with a clear top coat. (I used Jade-Clear top coat)
5. Let it dry fully and enjoy!

They look like miniature snow globes...perfect for the winter season or for Christmas.